
Prettiest Spring Nails
Delicate pastels and rich jewel tones are trending nail colours for springtime.
From blooming flower gardens to the sunny touches in your own home, you can find cheery and lively colours all-around this spring. Why should your nails be any different? As the weather warms up, It's time to shelf the moody blacks and wine-soaked reds — pastels and jewel tones are going to reign supreme this season.
Whether it’s bright pink, ocean blue or pretty pastels, spring nail colours are perfect for lifting your mood whilst we stay indoors. Whilst we’re all staying at home, soak off those gels, take of the old varnish, it’s time to treat yourself to a manicure or pedicure.
The Perfect Manicure at Home
We’ve been painting and perfecting nails for years so we’ve come up with our how-to guide, simple steps to get the perfect manicure. The idea is to make sure your nails stay super healthy whilst looking incredible until we can open and start doing nails again.
1. Clean your nails with nail polish remover or soak off gel nails with lots of nail varnish remover and tinfoil
2. Your manicure is defined by your nail shape. Whether you want to pull a Kylie or you’re after a more subtle look, you need to shape your nails accordingly. Shape, buff and file your nails to your preferred shape.
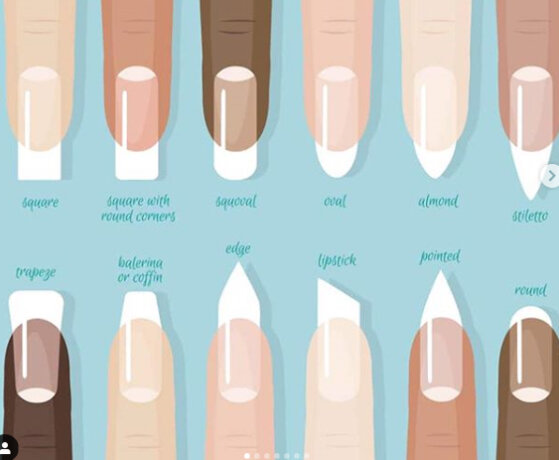
Here’s a roundup of the coolest nail shapes around.
Lipstick nails are defined by their slanted and sharp tips, which make them especially perfect for dual-tone colours.
Flare: the sharp, flared edges aren’t for the faint of heart, a shape for if you want to try something different.
Round: Soft, natural look that’s easy to maintain. File side to side to create the gentle arc. A great go-to for people who can’t grow their nails.
Oval: difficult to execute, since the slightly tapered end can easily veer into almond or round if you file too heavily or not enough. It takes patience to file —so go slow.
Almond: elongated at the tip with a round base. It’s very glamorous. The almond shape looks best on medium to long nails since plenty of length is required for the shape to be noticeable.
Square: the easiest to create, square edges are achieved by simply filing back and forth across the top of your nail. When filing the sides, make sure to keep the file perpendicular to your nail, and be careful not to apply too much pressure or the edge will take on a concave U shape versus staying straight and boxy.
Squoval: square meets-oval hybrid is a favourite because anyone can wear it—whether you have short, medium, or long nails—plus, it’s modern and soft. Create a subtle arc at your tips and then connect the sides so there’s a natural taper. Suits any nail length so give it a go.
Stiletto: dramatic and high maintenance and has to be gel overlays or acrylic.
Coffin: Celebs like Kylie and Khloé, have all made the coffin nail shape Insta famous. It looks like a coffin, strong tapered sides with a very straight edge across the top. Needs major upkeep and length, gel overlays or acrylic.
Ballerina: the stiletto’s softer-edged cousin, named after the top part of a ballerina’s pointe shoes, slightly convex sides and a straight tip. File your nail in a perfect oval shape and then squaring off the tapered tip.
3: Gently push back your cuticles. Be sure not to apply too much pressure when pushing back your cuticles as they are sensitive and important parts of your nail beds, preventing entry of foreign materials, microorganisms, and infections.
4. Wash, dry and moisturise your hands and cuticles for silky smooth hands.
Give nails a lick of colour
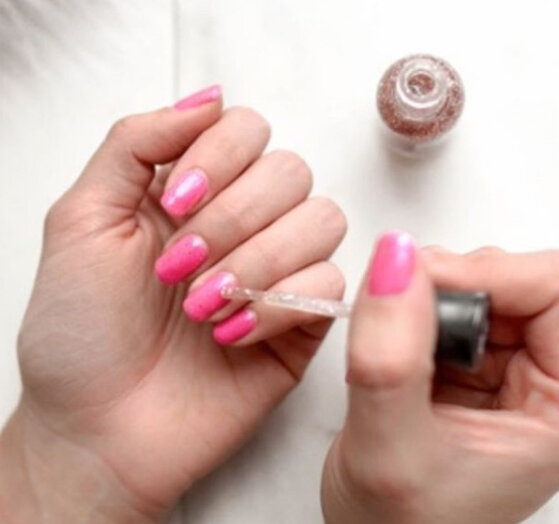
5. Apply a base coat and allow to dry.
6, Load up your brush and paint two coats of your favourite nail colour and allow to dry. Start from the centre of the nail and glide the polish downwards then repeat, matching the sides until you have got a full coverage glossy effect. (check out our favourites in our saved stories)
7. Clean up the edges of the nails. Finish with Topcoat for a long lasting, glossy manicure.

Treat your feet to a home pedicure
First step - give your feet a soak. Wash and dry off.
Step two- use a foot file. Use on dry feet to buff away dead, hard skin. It shouldn’t hurt so don’t apply too much pressure.
Step three - time to treat. Wet your feet, apply a foot scrub. Scrub between your toes and all over for smooth, fresh skin. Use scrub once or twice a week in the shower.
Step 4 - finish with a good hydrating foot cream or substitute with a body moisturiser. Apply daily to keep hard skin at bay, keeping feet healthy and in tip top sandal wearing condition.
Step 5 - nail the summer look, file nails straight across with a crystal nail file. Add colour for a professional finish.
To paint nails, follow the same procedure in the above manicure steps.